Wooden Fingerboard Ramps: DIY & Buying Guide
A well-designed fingerboard park is built around stable, properly scaled wooden obstacles with smooth transitions and non-slip bases that stay in place during a session. You can buy precision-crafted wooden ramps from specialty fingerboard brands, or build your own from thin plywood and basic materials at a lower cost. Buying delivers professional finish and consistent transitions; building gives you flexibility to create custom shapes and sizes. Either route, the key quality factors are the same: smooth surface, correct scale relative to your deck and trucks, and stable construction that does not shift when you apply downward pressure.
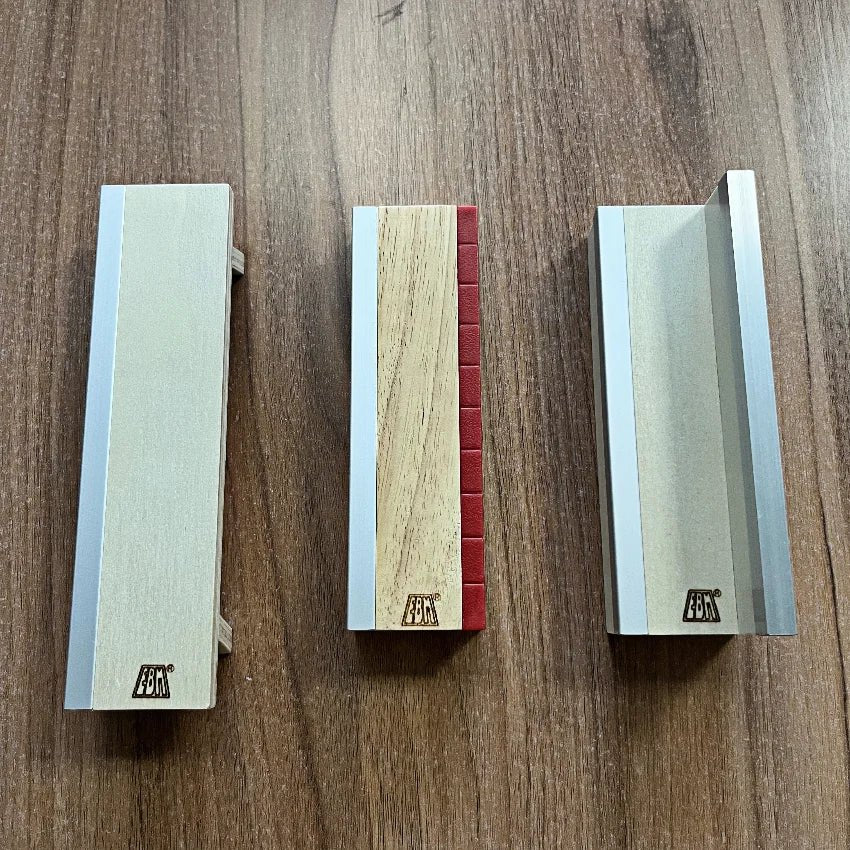
Mini Fingerboard Ramp — Quarter Pipe & Rail
Common Fingerboard Obstacle Types
Quarter pipes are the most fundamental transition obstacle in fingerboard parks. They consist of a curved ramp rising from flat ground to a vertical or near-vertical lip, mimicking the quarter-pipe sections found in full-size skate parks. Good quarter pipes have a smooth, even radius throughout the transition with no flat spots that cause a rider to stall unexpectedly mid-transition.
Rails are straight or kinked metal or wooden bars set at a height that allows a fingerboard's trucks to lock into a grinding position. Rail height and angle directly determine what grinds are possible and how much speed you need to reach the rail. Low rails favor bluntslides and nosegrinds; higher rails open up more elevated grinds. Metal rails typically grind smoother than painted wood rails.
Ledges are flat-topped obstacles, often mimicking the look of a curb or concrete block, that allow grinds on both the top edge and along the vertical face. A good ledge has a sharp, clean top edge and a smooth surface that does not catch truck kingpins or hanger corners unexpectedly. Wax applied to the edge can help, though most purpose-built fingerboard ledges are made from materials smooth enough that wax is optional.
Banks and hubbas replicate inclined surfaces and the angled concrete features common in street skating. Banks require smooth transitions from flat ground to slope and back again to allow clean approach and exit lines. Manual pads are flat, low-profile obstacles perfect for practicing manual tricks, and their height is critical: too high and a nose or tail manual becomes awkward to hold.
What Makes a Good Desk Fingerboard Setup
Scale is the first principle of a good fingerboard setup. Obstacles should be proportioned to match the dimensions of a typical fingerboard complete — roughly 96-100 mm long and 32-36 mm wide. An obstacle that is too tall forces awkward approaches, while one that is too short does not allow the board to properly lock into grinds or produce realistic-looking lines.
Stability is equally important. An obstacle that slides or tips when you press downward during a trick breaks the session rhythm and can cause inconsistent results. Good obstacles sit flat on the desk surface without rocking, and their weight or base design prevents them from moving under normal trick pressure. Wide, low-profile bases accomplish this better than tall, narrow constructions.
Surface smoothness determines trick feel more than any other single factor. The sliding surface of a ledge or rail needs to be smooth enough that the hanger of a fingerboard truck glides predictably without catching. Rough wood surfaces cause inconsistent grinds; properly sanded and finished surfaces allow clean, lockable grinds.
Buying Pre-Made Wooden Fingerboard Ramps
Specialty fingerboard brands produce wooden obstacles at a range of price points, from entry-level individual obstacles to complete mini-park sets. Production ramps from reputable brands are typically cnc-machined or hand-built to precise dimensions, ensuring consistent concave on quarter pipes, clean top edges on ledges, and pre-finished surfaces that are ready to skate immediately.
The primary advantages of buying are consistency and finish quality. A machined quarter pipe will have a mathematically even transition with no flat spots, something that is genuinely difficult to replicate by hand without careful templates. Production obstacles also tend to have professional surface treatments that last longer than DIY paint or lacquer applied in home conditions.
The main disadvantage is cost. A quality individual wooden obstacle from a fingerboard brand can range from moderate to significant depending on size and complexity, and a full park setup with multiple obstacles represents a meaningful investment. For riders who want a large variety of obstacles to session, building your own can stretch the same budget considerably further.
DIY Fingerboard Ramp Building: Basics and Considerations
Building your own fingerboard obstacles is a rewarding part of the hobby for many riders, and the materials required are inexpensive and widely available. Thin plywood or hobby-grade wood sheet in the 3-6 mm thickness range is the most practical building material. Thinner sheets bend more easily to create curved transitions on quarter pipes; thicker sheets are better for flat-top ledges and manual pads that need to hold their shape under direct downward pressure.
Sanding is the single most important finishing step for any DIY fingerboard obstacle. All surfaces that will contact the board or trucks during riding should be sanded progressively through increasingly fine grits, finishing at 220 grit or finer for riding surfaces and grinding edges. Unsanded or coarsely sanded edges catch truck hangers and produce inconsistent, frustrating grinds regardless of how well the rest of the obstacle is constructed.
A non-slip base prevents the obstacle from sliding around during sessions. Options include thin rubber sheet cut to match the base footprint, self-adhesive non-slip pad material, or even a thin layer of textured paint. The base should contact the desk surface evenly, so check that the obstacle sits flat without any rocking before finishing it.
For curved surfaces like quarter pipe transitions, a physical template cut from stiff cardboard or thin hardboard helps ensure the radius is consistent across the width of the ramp. Trace the desired curve, use the template to mark the side walls of the ramp, and cut carefully before bending and attaching the riding surface. The quality of the curve in the side walls is what determines whether the transition feels smooth or has flat spots.
Buying vs. Building: Which Is Right for You
Buying is the better choice if you want to start riding immediately with professional-quality obstacles, if precision transitions matter greatly for your practice, or if you do not have access to tools and workspace for cutting and shaping wood.
Building is the better choice if you want to create custom obstacle shapes that are not available from brands, if cost is a primary concern and you want to build a larger park on a budget, or if you enjoy the construction process as part of the hobby itself. Many serious fingerboarders do both: buy a few key pieces for their consistent quality and build the rest to fill in their park with variety.
Buying vs. Building Fingerboard Ramps
| Factor | Buying Pre-Made | DIY Building |
|---|---|---|
| Cost | Higher per obstacle | Lower — materials only |
| Transition quality | Machined, consistent | Depends on skill and templates |
| Surface finish | Professional, ready to skate | Requires careful sanding |
| Custom shapes | Limited to available products | Unlimited flexibility |
| Time to session | Immediate on arrival | Hours of construction first |
| Satisfaction | Convenience-focused | High if you enjoy building |
Frequently asked questions
What wood is best for DIY fingerboard ramps?+
Thin plywood or hobby-grade wood sheet in 3-6 mm thickness is the most practical choice. Thinner sheets (3 mm) bend more easily for curved transitions like quarter pipes; thicker sheets (5-6 mm) are better for flat ledges and manual pads. Sand all riding surfaces to at least 220-grit before use.
How big should fingerboard ramps be?+
Fingerboard obstacles should be scaled to a standard fingerboard complete, which is roughly 96-100 mm long and 32-36 mm wide. A typical quarter pipe height of 60-100 mm is a common and practical range for desk setups. The exact size is flexible, but proportions that look realistic at fingerboard scale also tend to feel correct to ride.
Do fingerboard ramps need to be made of wood?+
Wood is the most popular and widely used material because it is easy to shape, sands to a smooth finish, and is inexpensive. Some obstacles use metal components for grinding surfaces, particularly rails, and 3D-printed plastic ramps are also available. Wood remains the standard for most park setups because of its versatility and feel.
How do I stop my fingerboard ramps from sliding around?+
Attach a non-slip base to the bottom of each obstacle. Thin rubber sheet, self-adhesive non-slip pad material, or rubberized paint applied to the base are all effective options. The base should contact the desk surface evenly across the full footprint without any rocking to maximize stability.
Are pre-made fingerboard ramps worth the cost?+
For riders who prioritize ready-to-skate quality and precise transitions, yes. Production ramps from specialty brands deliver machined consistency that is difficult to replicate by hand, and they require no construction time. For riders who want a large variety of obstacles on a budget and enjoy building, DIY is more cost-effective.
Ready to build?
Shop precision completes, decks, molds, and hardware from the Lab.